UDOO Neo Documentation
Serial Debug Console
Overview
UDOO Neo features a Serial Debug Console available on the external pinout which is very useful to have a complete debug console starting from the boot process.
Connecting via serial will practically result in a shell console, the same as the one you’ll obtain through SSH connection http://en.wikipedia.org/wiki/Secure_Shell.
You can find a useful accessory in the UDOO shop to easy exploit the Serial Debug Console of UDOO Neo: the USB-to-TTL/Serial Debug Module for UDOO NEO.
The Serial Debug Console is available through UART 1 over the external pinout header J7 on two pins, 46 and 47 (PCB names). You can find more info useful to locate the pins in the UART Serial Ports section.
If you haven't the official UDOO NEO accessory module you can use a any other standard USB-to-TTL/Serial dongle available in the market.
Connecting via Serial
Choose the OS you use.
Connecting via Serial from Windows
-
Download the serial adapter Driver. For the official
USB-to-Serial debug module for UDOO NEOyou can find the Driver in the Silabs page:- Install the proper version for your Operating system (Check how to define your Windows version):
- CP210xVCPInstaller_x86.exe for 32-bit systems
- CP210xVCPInstaller_x64.exe for 64-bit system
- Install the proper version for your Operating system (Check how to define your Windows version):
-
Download and install a software to manage the serial like Putty
-
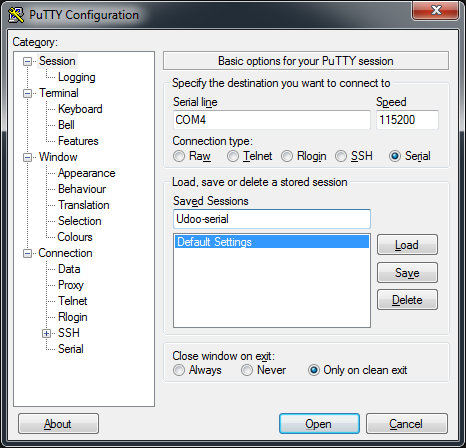
Open Putty and configure it as follow:
-
Connection type:
serial -
Port:
COM3(please note that this value may be different, check the number of the COM assigned in Windows Device Manager) -
Speed:
115200
-
Connection type:
-
Save it the configuration as
Udoo-serialfor future uses.
-
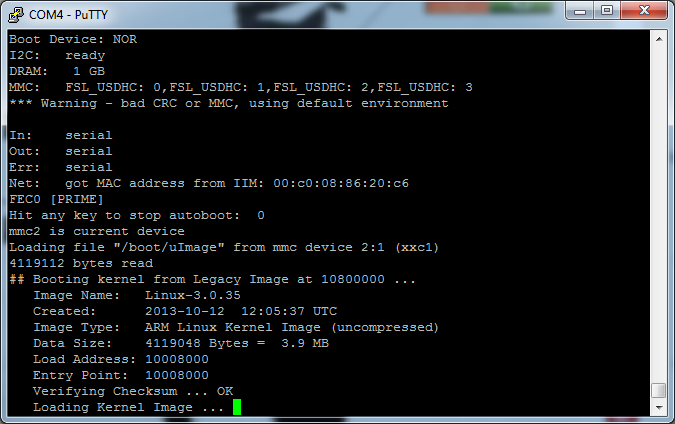
Click Open
-
You’re in! You’ll be able to see the startup process and access to the remote shell console on UDOO NEO.
-
Connect the serial port of UDOO NEO to your PC using the micro USB cable.
-
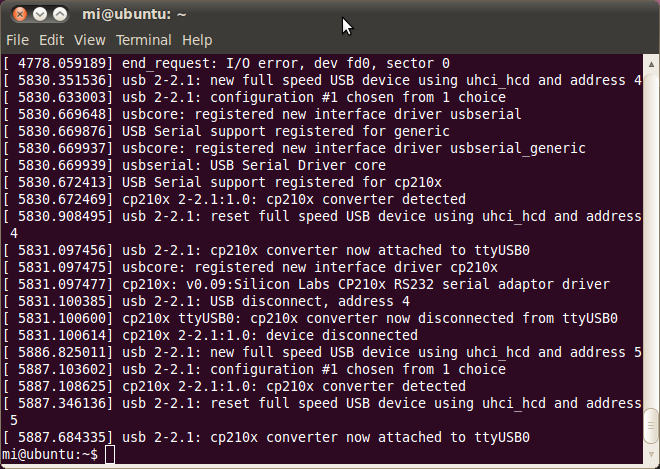
Type
dmesg
- You should see this line at the end
usb 2-2.1: cp21x converter now attached to tty
- Install minicom:
sudo apt-get update
sudo apt-get install minicom
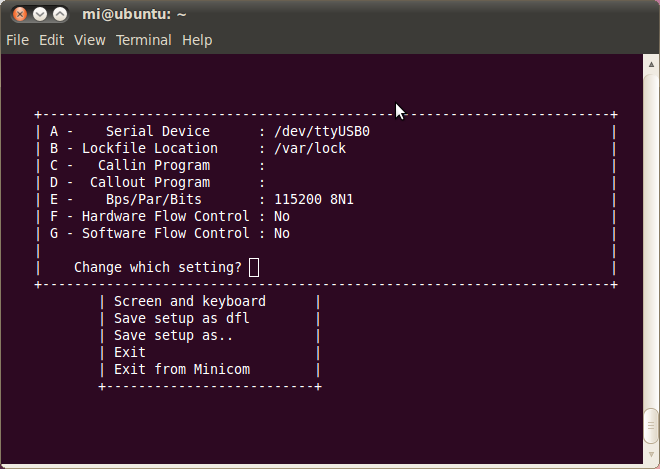
- Open Minicom and configure it (only the first time) using the following command:
sudo minicom -sw
- Go to “Serial port setup” and edit as follow: Serial Device: /dev/ttyUSB0 (type a key) Hardware Flow Control: No (type f key) Software Flow Control: No (type g key)
-
Press exit and "Save setup as dfl"
-
Exit from Minicom
-
Let’s give proper access permissions to serial port with:
sudo chmod 666 /dev/ttyUSB0
- Now we can start listening with:
sudo minicom -w
- Power cycle UDOO NEO to see the boot process and connect it to serial console shell
Connecting via Serial from Mac
-
Download the serial adapter Driver. For the official
USB-to-Serial debug module for UDOO NEOyou can find the Driver in the Silabs page: -
Connect the serial port of UDOO NEO to your PC using the micro USB cable.
-
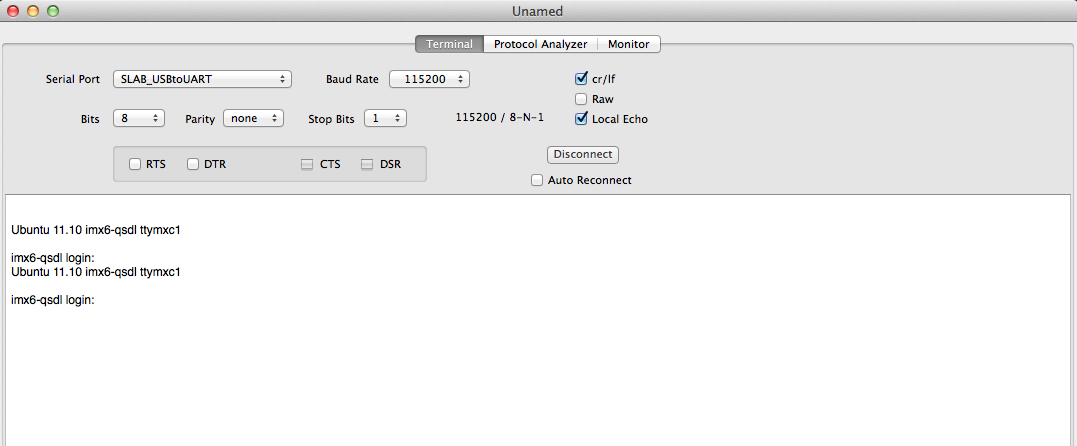
Download and install Serial Tools https://itunes.apple.com/it/app/serialtools/id611021963 or directly from the Apple Store
-
Open Serial Tools, and change the following parameters: Serial Port: “SLEB_USBtoUART” Baud rate “115200”
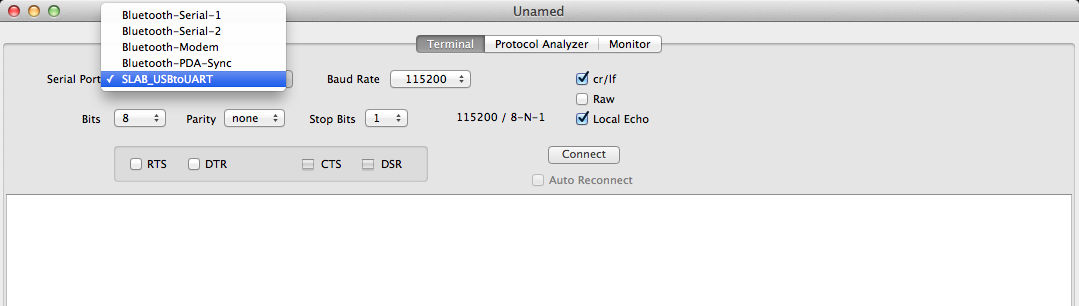
- Hit connect, and here you go!