 UDOO Neo Documentation
Knock sensor
Description
Knock sensor module and a digital 13 interface, built-in LED build a simple circuit to produce percussion flasher. Interface comes with digital LED, will knock sensor connected digital 3 interface, when percussion sensor senses measure to percussive signals, LED flashing light.
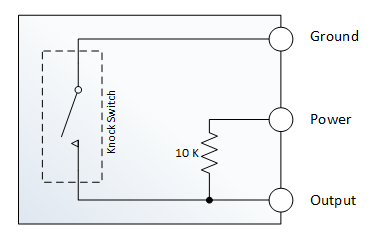
The knock sensor, detects the knocks and the taps. It can work like a switch. The sensor sends data momentarily to the board. To keep the LED on, the button state change codes should be used. So the sensor will work as a switch.
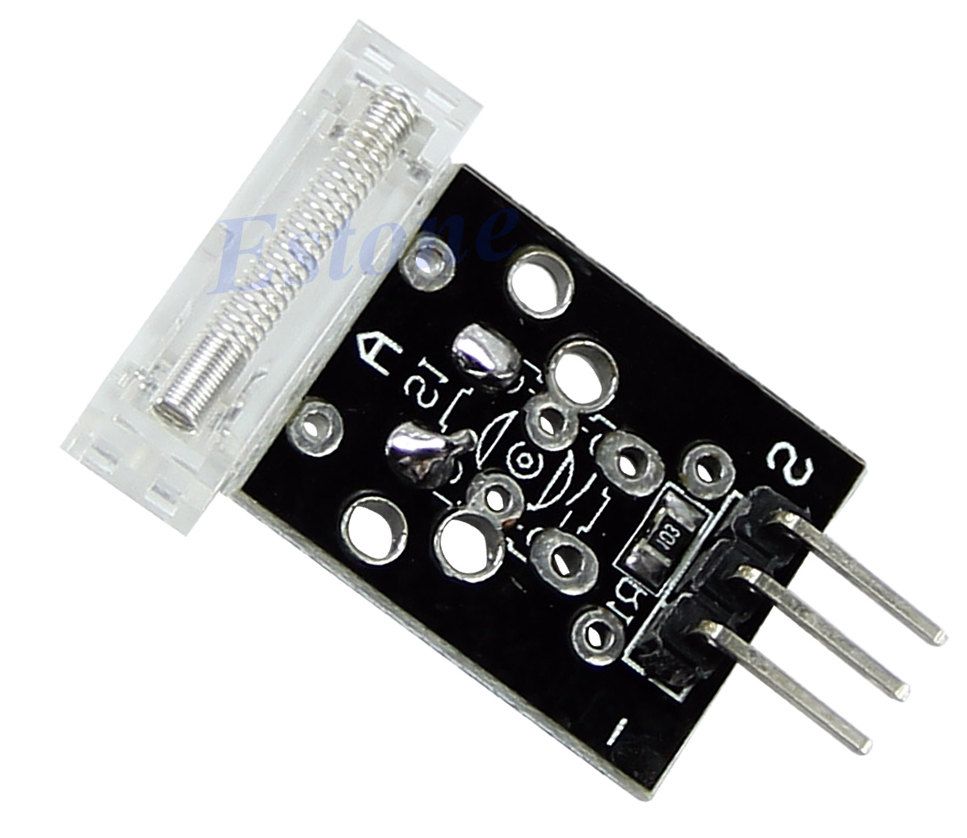
KY-031 (Knock Sensor)
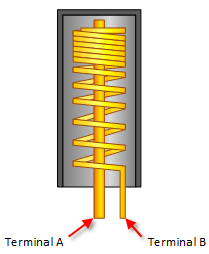
The switch primarily consists of a terminal that forms a center post and a second terminal that is a spring that surrounds the center post.
When a sufficient force is transferred to the switch, the terminal consisting of the spring moves and shorts both terminals together.
The connection between the terminals is momentary and will require a little thought as you implement it in your Arduino project.
Positioning of the switch is also important. Generally speaking the switch should be physically located as close as possible to the area being monitored. Otherwise, the vibration being detected may be dampened by other structural components in your project.
An exception to this rule may be where you find that the switch is too sensitive for your application. In this case, moving the switch further away from the area of interest may make it less sensitive.
Examples
const int knockPin = 3;     // the number of the knock sensor pin
const int ledPin =  13;      // the number of the LED pin

// variables will change:
int buttonState = 0;         // variable for reading the knock sensor status

void setup() {
  // initialize the LED pin as an output:
  pinMode(ledPin, OUTPUT);
  // initialize the knock sensor pin as an input:
  pinMode(knockPin, INPUT);
}

void loop(){
  // read the state of the knock sensor value:
  buttonState = digitalRead(knockPin);

  // check if the knock sensor is pressed.
  // if it is, the knock sensor is HIGH:
  if (buttonState == HIGH) {
    // turn LED on:
    digitalWrite(ledPin, LOW);
  }
  else {
    // turn LED off:
    digitalWrite(ledPin, HIGH);
  }
}
const int  buttonPin = 3;    // the pin that the pushbutton is attached to
const int ledPin = 13;       // the pin that the LED is attached to

// Variables will change:
int buttonPushCounter = 0;   // counter for the number of button presses
int buttonState = 0;         // current state of the button
int lastButtonState = 0;     // previous state of the button

void setup() {
  // initialize the button pin as a input:
  pinMode(buttonPin, INPUT);
  // initialize the LED as an output:
  pinMode(ledPin, OUTPUT);
  // initialize serial communication:
  Serial.begin(9600);
}

void loop() {
  // read the pushbutton input pin:
  buttonState = digitalRead(buttonPin);

  // compare the buttonState to its previous state
  if (buttonState != lastButtonState) {
    // if the state has changed, increment the counter
    if (buttonState == HIGH) {
      // if the current state is HIGH then the button
      // wend from off to on:
      buttonPushCounter++;
      Serial.println("on");
      Serial.print("number of button pushes:  ");
      Serial.println(buttonPushCounter);
    }
    else {
      // if the current state is LOW then the button
      // wend from on to off:
      Serial.println("off");
    }
  }
  // save the current state as the last state,
  //for next time through the loop
  lastButtonState = buttonState;

  // turns on the LED every four button pushes by
  // checking the modulo of the button push counter.
  // the modulo function gives you the remainder of
  // the division of two numbers:
  if (buttonPushCounter % 4 == 0) {
    digitalWrite(ledPin, HIGH);
  } else {
   digitalWrite(ledPin, LOW);
  }

}